 So, we have this issue at the office with our single-person bathrooms. We have one "m" bathroom and one "w" bathroom. We have 40+ people in the office. Many people who sit out-of-sight from the bathrooms often walk all the way across our office only to find out that someone else has beaten them to the potti.
To solve this problem, I took a Make Controller from MakingThings.com, wired a couple of Vishay TEMT6000 ambient light sensors (photo transistors) to it, then wrote a Mac desktop app to sit in the status bar to show everyone the status of the pottis. I call it, "iPotti™" and it works awesome!
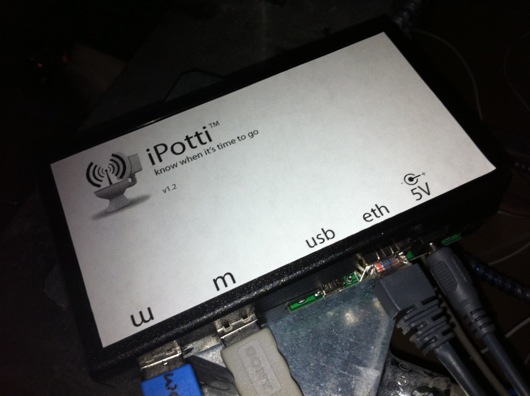
At the heart of iPotti™ is the Make Controller. It's an Atmel Sam7 ARM microcontroller with the Make Interface Board stuck to it. The Interface Board has Ethernet, USB, power and breakout headers for the pins of the microcontroller. I wrote a slim little piece of firmware for it that simply broadcasts UDP packets with the status of the pottis. It broadcasts a packet about every couple of seconds.
At the receiving end of the iPotti™ system is a little Mac OS X app designed to sit up in the OS X status bar:
The letters are green when the pottis are available. They turn red when the lights go on inside the bathroom. Lights are the whole trigger in this device. I didn't want to get into sensing AC current in the light wiring or tapping into the switches. This was the cheapest and easiest to get done quickly and without forking out too much coin.
The status menu item has a drop-down menu, as well. It's how you quit the app or check the About dialog:
The About dialog is pretty simple, but it turns out to be indispensable, since I've now released about three updates to the client software.
The sensors see ambient light like the human eye does. I mounted them up above the bathrooms and oriented them to look through little vent holes in the lighting canisters. The light cans keep themselves pretty cool, so there shouldn't be any worries about melting the little sensor thingies. (Read on to see the sensors and their PCBs.) Here is what they look like mounted near the ceiling light cans:
The sensors are spliced to 4-wire alarm cables that run back to the main iPotti™ server. The two cables join into a single RJ-45 connector (same one used for Ethernet, looks like a big phone jack connector) and then snap into a port in the side of the iPotti™ device box.
Another sweet technical feature of the installation is that our office uses IP phones that get their power from the Ethernet switches. It's call, "POE," which stands for Power Over Ethernet. We bought a little Cisco®/Linksys® POES5 5-Volt splitter that happened to have the proper little coax power connector AND it was the proper polarity, so I didn't have to do anything to hack it together. Here's what it looks like connected up, powering and communicating (outside of the case, of course):
Inside its case, the iPotti™ looks like this:
The Make Controller doesn't fit perfectly in this spare project box I had, but it's good enough for a device that nobody will ever see (hardly ever, anyway). The two white cables protruding from the left side of it are being replaced with the RJ-45 jack for the sensors. Originally, in version 1.0, the cables went right inside the case, wrapped around a screw post for strain relief, and then jacked into the controller.
The latest incarnation (the one that is live and connected now) uses some recovered USB ports from some circuit board I had in my junk pile. I took the ends off of two old USB cables and spliced them onto the ends of the bathroom light sensor cables. I should have done that from the start, but I was lazy and anxious to get this thing up for testing. Now, I can easily disconnect it and update it or maintain it.
The only fab I had to do was on the sensors. They are surface-mount (SMD) and they require a resistor, so I made little PCBs for them using my usual toner-transfer process:
Fully assembled, they each look like this:
The real trick will be getting people to remember to turn of the lights behind them. We've had signs up for the for the longest time to remind people. Occasionally, someone does forget. Overall, the solution works well.
Lessons learned from this project: A little Make Controller doesn't fair well as a web server when 40+ workstations are hitting it every two seconds. The 1.0 version of the system had the iPotti™ main device set up as a web server and the iPotti™ app hit the server every couple of seconds. This was painful and dumb. I chose that over UDP out of laziness and fear of the unknown (I had never set up UDP broadcasts on the Make Controller's lightweight IP stack AND I hadn't done it yet in my Cocoa [Mac OS X] development adventures). Turns out that UDP was stupidly simple to implement on the Make Controller AND for OS X. I should have done it from the get-go.
Here are some other photos of the installation and a famous red box...


