A few of my meltmedia coworkers, dear friends and fellow bourbon enthusiasts have a private little bourbon paradise speakeasy we've established near the office. We call it, "Halcyon." If you visit, you can even get a shirt. It's a quaint little place with fine furnishings, a stock of bourbon that approaches my own, art on the walls, a life-sized concrete flamingo and a dozen or more flickering LED candles. But, therein lies the problem: Light.
I decided to build a gift to Halcyon and its members. We needed a little more light in there at times (specifically, while preparing drinks before the very important conversations started). The candles were nice, but quite dim. We'd need a hundred to make it a well-lighted place. ;) My gift? A dimmable, Bluetooth-controlled, battery-operated, custom-built bourbon bottle chandelier.
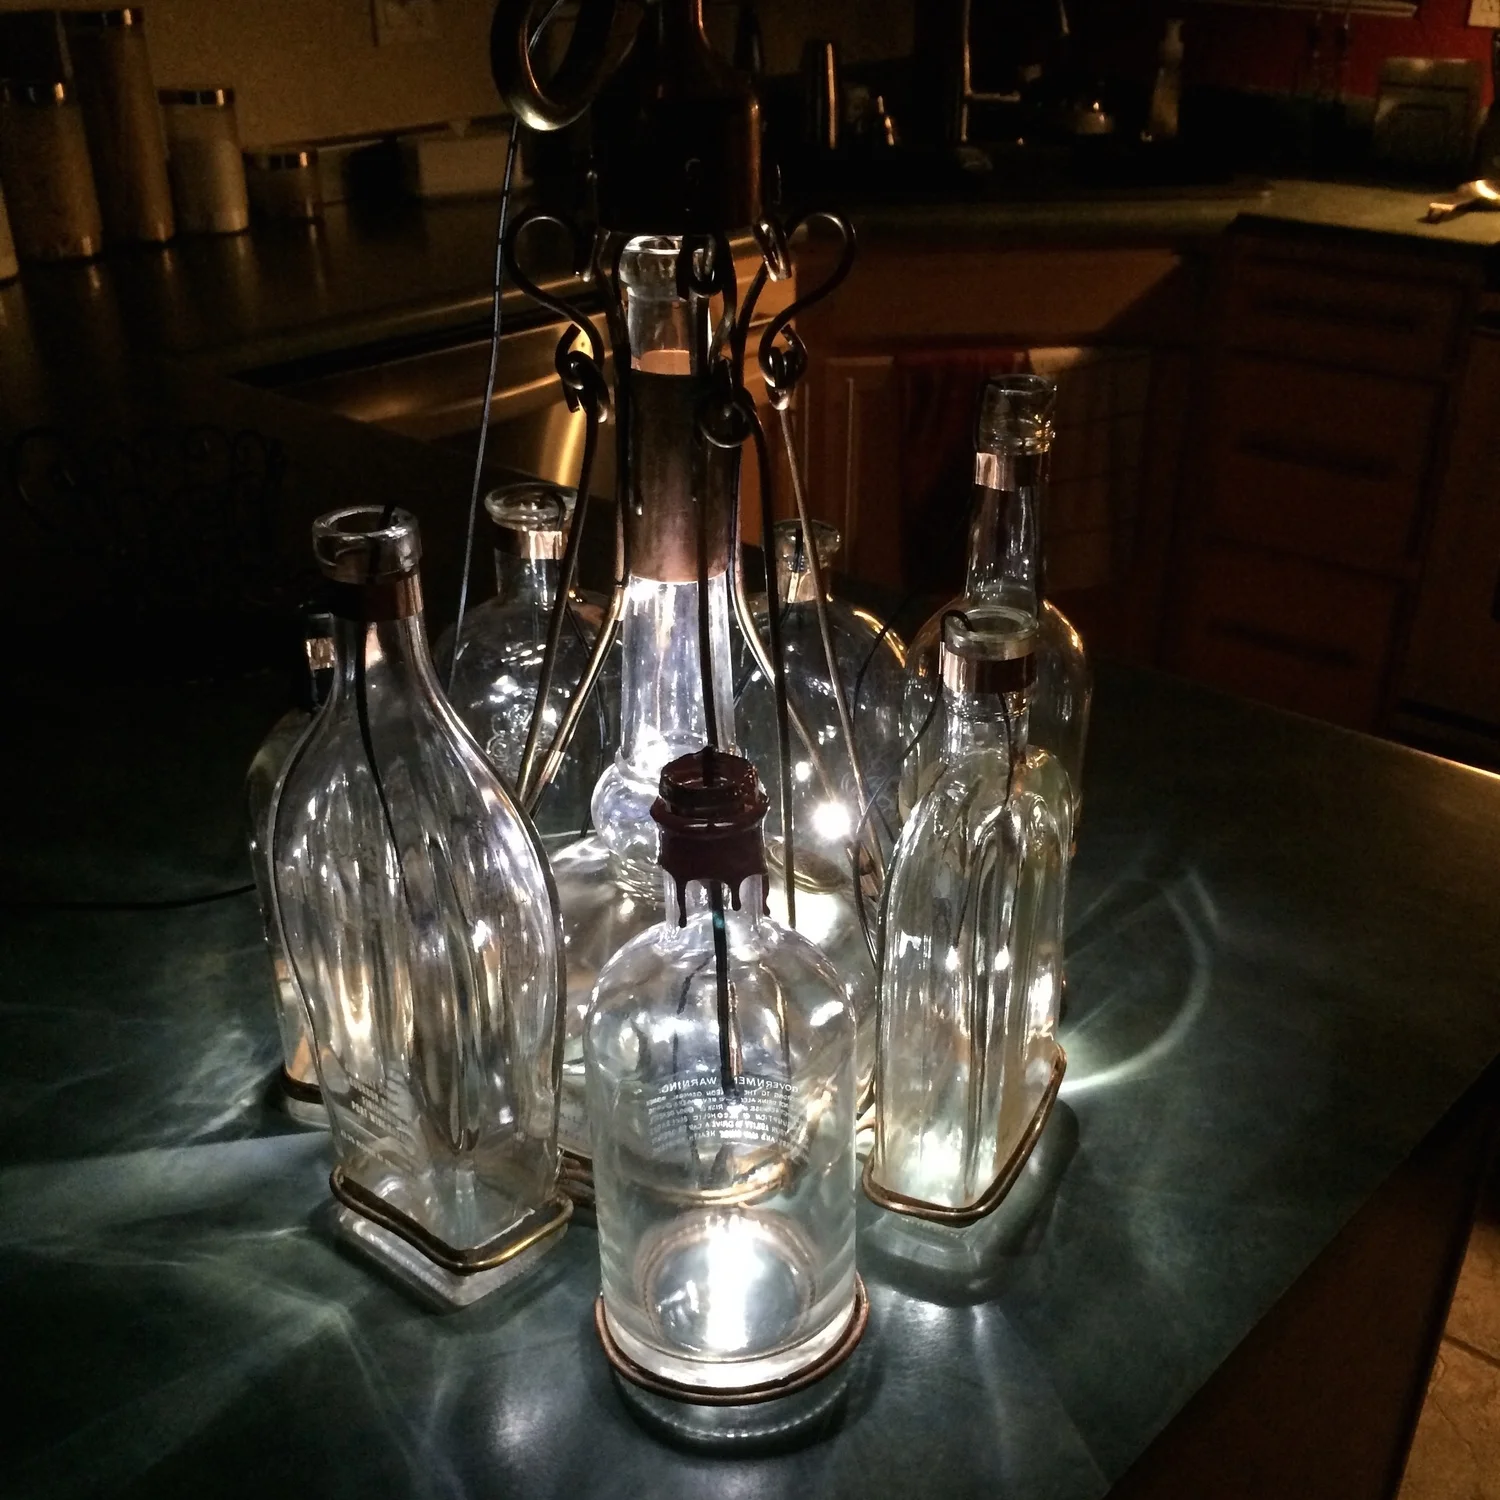
The Bluetooth-controlled, dimmable LED hand-built bourbon bottle chandelier at Halcyon
How to Make?
It's actually not that difficult as an idea, but in practice it turns out wrangling about 20 or 30 pounds of thick and odd-shaped bottles it a bit of work. The build time was about 20 hours, and the crazy thing is that the electronics part only took about 1 hours. Silly.
I started out by gathering a bunch of "dead soldiers" of our favorite bourbons. The centerpiece is a big Costco-sized Willet bottle. Works great because of the wide base and super-tall neck. The other seven standard bottles are circled around the big Willet bottle.
I bought some copper grounding wire from the hardware store. It's really heavy gauge solid copper wire. It's easily bent, but sturdy enough to hold shape, especially in shorter pieces. I made little bent ends on four pieces of the wire and hooked them under the edge of the Willet bottle to start the support structure of the light:
Willet Bottle as the Center of the Bourbon Bottle Chandelier
The thin wire in the photo above was to keep everything in-place while I worked around it.
On the bottles that surround the center, I used copper tape to put rings of copper around the bases of the outside bottles. This would allow me to solder support structure to the bottles, instead of simple wrapping them with wire or some other kinda attachment that didn't seem super-sturdy.
Copper Tape on Bases of Outside Bottles
I was in a bit of a rush, so the soldering on this job looks poor. But, it's been holding rock solidly without a problem at all.
Then, each bottle got its own heavy-gauge copper wire support gripper thing:
Copper Wire "Strap" on Outside Bottle Base
Once all of the outside bottles had a way of "holding hands" around the center bottle, I arranged them around the Willet bottle and did a little more bending to get all of the support arms interwoven and ready for soldering.
Outside Bourbon Bottles Soldered Together (Underside)
I had to turn the whole mess of bottles upsidedown to make it easier to solder all of the support arms together. ince the bottles were of varying height and shape, I had to make a jig (using that term loosely, of course) to get their bottoms (snicker) at the same level while arse-end-up.
I bent and twisted the arms together to form as nice a ring as possible. I used thinner bare copper wire to wrap the pieces together to keep them in place while I soldered everything. It was a bulk solder campaign and beauty was not part of the strategy, as you can see. But, it turned out strong.
Next up was the vertical support structure. It needed to hold all of the bottles from a top central hook. I ran those four heavy wires up from the bottom of the Willet bottle and kinda got them in the right positions for connecting them to a neck at the top of the Willet bottle:
Vertical Support Wires and Copper Pipe Neck Piece
I soldered the four support wires to the pipe around the neck of the Willet bottle. I left plenty of extry wire to bend and shape into something ornate-ish.
I bought a big brass clipping hook from Ace Hardware and a copper reducing fitting. I drilled holes in four equally-space spots around the bottom, wider part of the reducer and two holes at the top for the hook. I made fancy-esque hooks our of the four support wires.
Fancy-ish Copper Hooks for Neck
I made a few little connector links out of the same wire and put them through the four holes in the pipe reducer piece. I made one more link to go through the two top holes in the reducer and wrapped the link through the brass hook's ring.
Here's a close-up of the heavy-duty copper neck and support structure at the top of the center bottle:
Copper Support Structure at the Top of the Bourbon Cottle Chandelier
By now, I was thinking this thing was starting to look like, "Frankenchandelier." But it had charm, so I kept at it. The labels on the bourbon bottles looked like too much, confirmed by my work wife Ron, also a bourbon enthusiast. So, off the labels came in a whirlwind of hot steam.
Labels Stripped from Bourbon Bottles
So, that was it for the chandelier itself. Now it needed light! That was provided by very bright 5mm white LEDs:
Bright White 5mm LEDs in Each Bottle
These little guys are VERY bright, run on 3.2V to 3.4V and draw about 30mA. Easy to use. I soldered two-conductor wire to the ends of them and closed the LED end with some heatshrink tubing for good measure.
LightBlue Bean from Punch Through Design
The chandelier is dimmable using an app on the iPhone over Bluetooth. The controller in charge of running the light show is a LightBlue Bean from Punch Through Design. These are programmable over Bluetooth using the regular Arduino IDE. SUPER easy to program and use. It took me less than an hour to mock up the circuit on a breadboard and then encapsulate it in a plastic box.
Bourbon Chandelier Control Circuit on Breadboard
To make things super simple, I used a little 3.3V switching regulator and all the power for the whole chandelier comes from four D cell batteries. The regulator puts out a really clean 3.3V, which is right in the sweet spot for the LEDs and the LightBlue Bean runs happily on 3.3V, as well. The dimming of the LEDs is controlled through a MOSFET via PWM from the Bean. Pretty standard LED circuit there.
Once I had it functioning on the breadboard and controllable by my iPhone, I put it in a little plastic box and strapped that to the D cell battery holder and added a switch:
Bourbon Chandelier Control Circuit Enclosure Strapped to the D Batteries
I strung the LEDs through the chandelier and into the bourbon bottles.
LEDs Strung Through Bourbon Bottles
All of the wires from each LED meat under the big Willet bottle and one from each was soldered to one side of a little piece of double-sided copper-clad board (same stuff I make printed circuit boards from). That side of the board was connected to ground in the control circuit. The other wires were connected to the opposite side which was then connected to the drain (load input) of the MOSFET. The gate of the MOSFET is connected to the PWM pin on the Bean. The source pin of the MOSFET is connected to ground.
I cleaned up the wiring, put an "On/Off" label on the switch on the enclosure and gave the circuit one more look-over to make sure it would function on the first try.
Completed Bourbon Bottle Chandelier Circuit Enclosure
And then, it was time for the big test: Turn that puppy on and control it with the phone!
First Test Run of the Bourbon Bottle Chandelier
Here it is in action at the Original Halcyon Speakeasy in a secret location near meltmedia in beautiful Tempe, AZ:
Bourbon Bottle Chandelier Live at Halcyon Speakeasy